Firmware V1.1.3 and above
Enter Setup Mode.
Use the side button to open CNC Dock's guided first-time setup page.
Choose a different firmware versionConfiguration sequence
Follow these steps once.
- 01
Allow the initial boot cycle to finish
- 02
Enter Setup Mode
After the initial boot cycle finishes, press and hold the small button on the side of the device. Several messages will appear on the screen. Continue holding the button until the screen displays Entering Setup Mode. This typically takes 10–15 seconds. Then release the button.
- 03
Open the setup page
On the connected computer, open a web browser and go to 172.31.253.1.
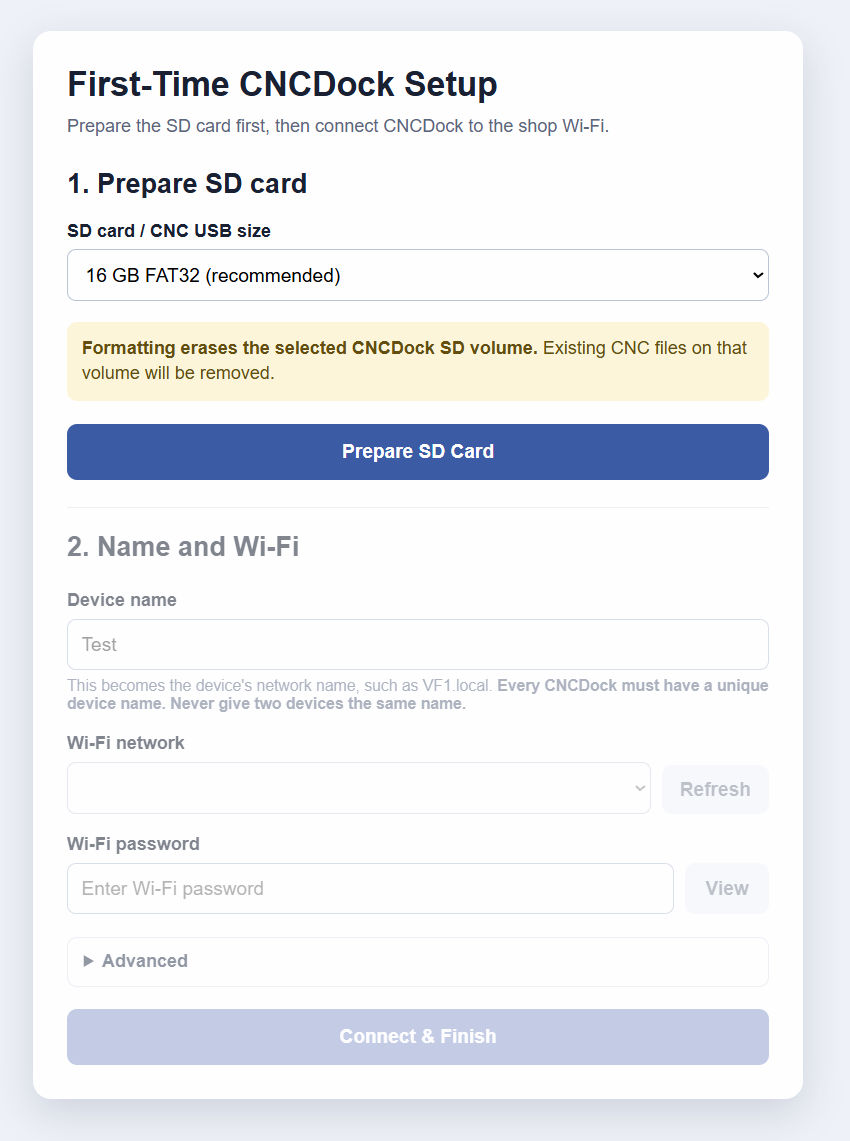
The first-time setup page displayed at 172.31.253.1 - 04
Complete setup
Follow the on-screen instructions to prepare the SD card, name the device, and connect CNC Dock to your shop Wi-Fi.
- 05
Connect CNC Dock to the CNC
Congratulations—you have now set up CNC Dock on your PC. Unplug it from the PC and plug it into the CNC machine.
- 06
Open the file manager
Return to your PC and open a web browser (Chrome/Edge/Firefox/Etc.). Navigate to name.local, replacing name with the device name you entered during setup. For example, if you named the device VF2, go to VF2.local. The main file manager page will load, and you can begin dragging files onto CNC Dock.
- 07
Understand the Web File Access timer
When you drag in a file or click Enable Web File Access, a timer appears at the top of the page. CNC Dock temporarily disconnects itself from the CNC machine—virtually—while you browse or add files. This ensures that only one system has write access at a time and helps prevent file corruption.
If you upload a file and immediately return to the CNC, it may appear that no USB drive is connected. CNC Dock is still making the files available to the web browser. It automatically reconnects to the machine when the default 90-second timer ends. You can change the automatic reconnection time by clicking the Settings button at the top of the file manager page.